Knitting: How-to Purl
How to make the purl stitch in knitting
How to Purl Knit in 5 Easy Steps
Purling is the second stitch learned in knitting. It's actually the reverse of the knit stitch.
Once you learn the knit stitch and the purl stitch, you'll find that all other stitches are simply a combination or a variation of these two basic stitches.
Here's how-to purl in just a few simple steps.


Step 1: Place the needle holding the cast-on stitches in your left hand, ensuring the yarn tail is at the bottom, and the working yarn (the yarn attached to the ball) is at the top near the needle tip.
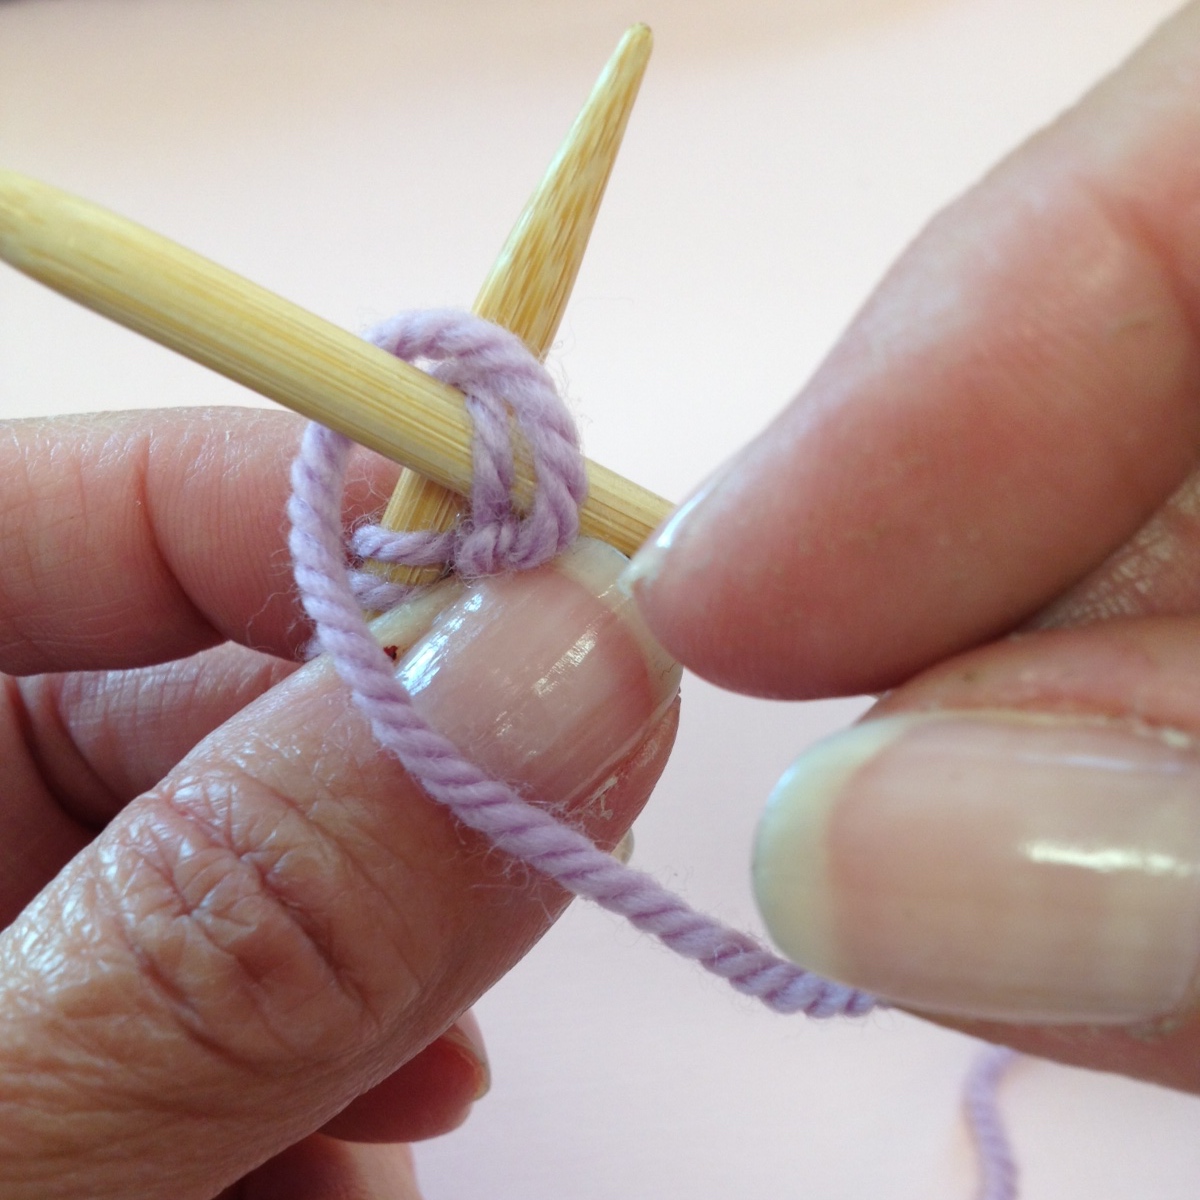
Step 2: Holding the second needle in your right hand, insert the tip of this needle into the stitch (or loop) closest to the tip of the left hand needle from top to bottom .
Looking at the image above, the needles form a + (left hand needle behind, right hand needle in the front and angled slightly downward). The working yarn is being held forward and upward , so it's ready to wrap.
Step 3: With your right hand, swing the working yarn to the left and bring it around the right hand needle, wrapping that needle counter-clockwise. The images above show how it's done.


Step 4: With the right hand needle tip scoop upward and catch the yarn that you just wrapped, drawing it through the loop.
Step 5: With right hand needle, slide the loop just made off the left hand needle. One purl stitch made.
Repeat these steps across the row. When you alternate a knit row with a purl row you produce the stockinette stitch.


