
Knitting: How-To Cable Cast On

Learn a New Cast On!
The cable cast on is a very easy to master knitting technique and one you will want to use often. Many knitters use it as their go-to cast on! It provides a more stable cast on than a long tail cast on and has a pretty braided effect.
Why use the Cable Cast-On?
As I mentioned before, this cast on provides a more stable cast on than other methods, so it's good for using on projects that require a bit more stability. It's great for making buttonholes, too. My favorite reason for using the cable cast on is when you are asked to cast on an additional number of stitches in a pattern. Instead of the flimsy loop cast on, you'll have a nice sturdy cast on in keeping with the rest of your project. Give the cable cast on a try in just 4 easy steps!

How-To Cable Cast On
Step 1:
Begin by making the usual slip knot (leaving enough of a tail to weave in later) and cast on one more stitch using any cast on method.

Step 2:
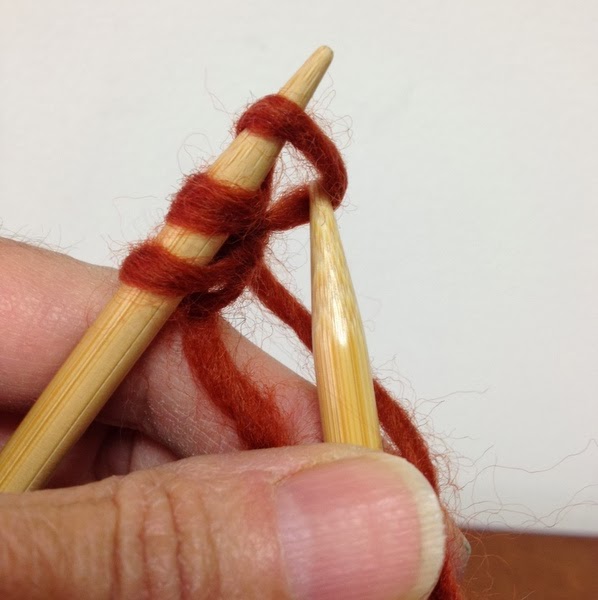
Insert the tip of the right hand needle between your slip knot stitch and your first cast on stitch

Step 3:
Wrap the working yarn between the needles (as if to knit)
Draw out a loop between these 2 stitches and place it back on the left hand needle.
Step 4:
Draw the loop between the last 2 stitches on the needle, as pictured above, until you have cast on the required number of stitches.
Knitting Doctor Tip:
The secret to this cast on is to do it a little loosely so your first row moves easily off the needles. If you find you are casting on too tightly, try casting on using a larger needle.
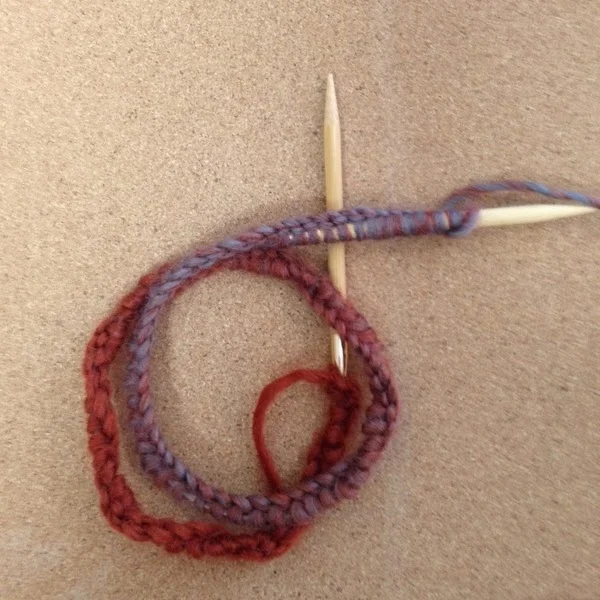
Now, take a look at your cast on as it grows. Can you see the braided edge showing up yet? When you have several stitches cast on, your edge will look very much like this.

You’ll notice as you cast on each stitch your last stitch sits at an angle. This is exactly how it should look and this angle. The angle is what creates the braided effect.
Happy knitting!


