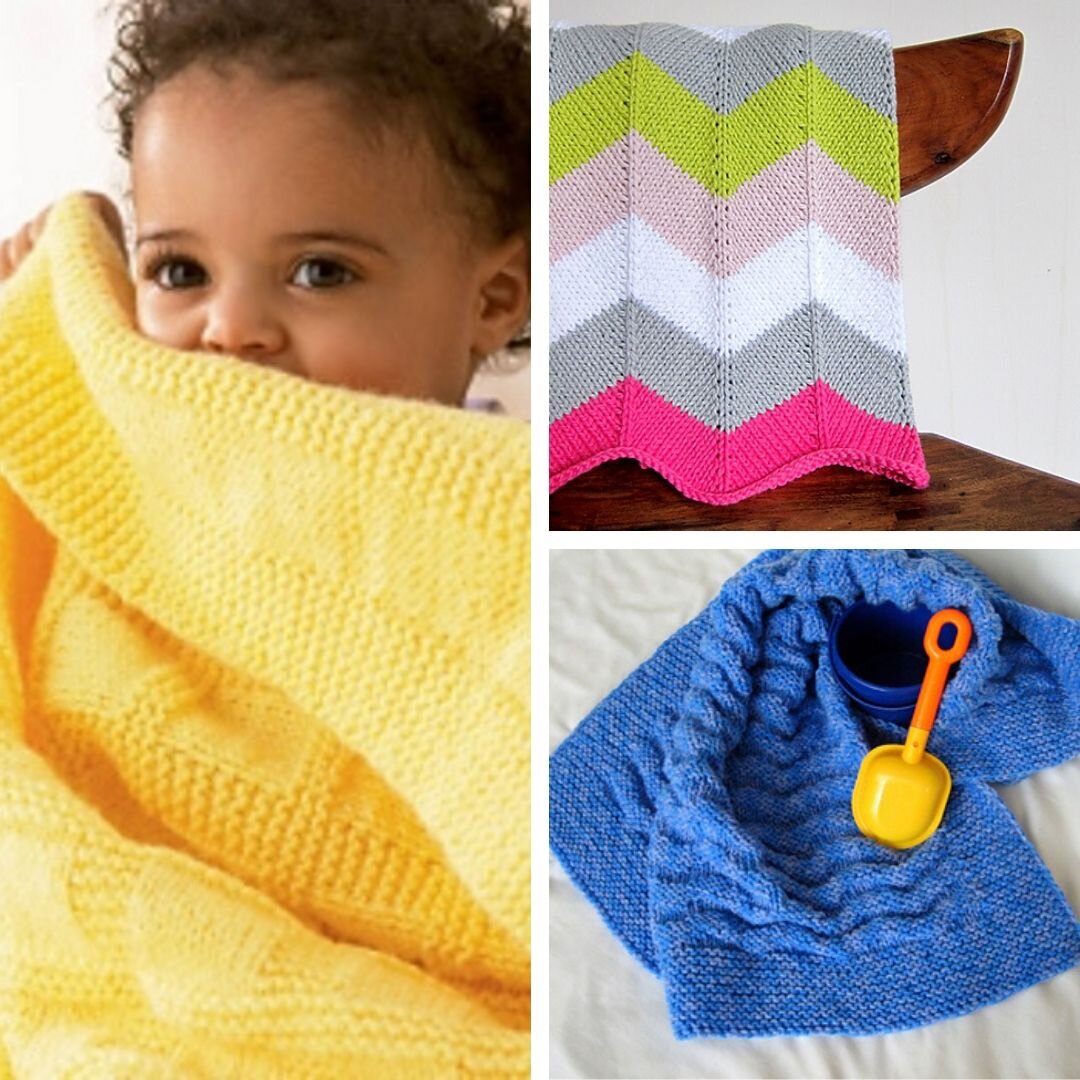
How to Knit a Triangle Shawl for Beginners
Hey knitters! In today's video I'm going to show you how to make this gorgeous shawl in just four easy steps. I'm here to show you how to make this really large one skein shawl.
The best part is that any knitter can knit this; it’s a beginner project!
This post may contain affiliate links. Please see my full disclosure for more information.
It's a diagonal shawl, but the magic comes in is that you are knitting it on the bias by just making one increase. We start here at this little corner and and we just increase on one side until you get this really large bottom. There is no decreasing that goes into this.
This increase side becomes the top of your shawl so it looks like you knitted diagonally but really you just added an increase and i'm going to show how to do that step by step in four easy steps.
Completed Shawl Measures: 26” deep at center x 52” wingspan
Gauge: 16 stitches to 4” in garter stitch
Materials
1 cake of Lion Brand Shawl in a Cake Yarn in Sun Salutations OR 480 yards worsted weight yarn (#4 medium weight by Craft Yarn Council)
If you want a PDF PRINTABLE version of this pattern, add your email below!
Add this project to your Ravelry Library.
Related Posts
Knitting Abbreviations Reference Guide (with free printable)
Step 1: Casting On
I like to leave a tail about 12 inches just to make sure I have enough yarn to weave in at the end.
Begin by making a loop for your slip knot.
We'll put the slip knot on the needle with the tail in the front. And you just tighten that up. Make it tight enough that it's secure on there but you also want to make sure that you can easily glide your stitches on the needle.
Now we're going to cast on three stitches. In this case, we already have one stitch on the needle, that slip knot is our first stitch.
Now we're going to cast on two more. I'm going to do a long tail method so I come in-between the tail and the yarn ball then I grab the rest of the stitches. I have my thumb on the tail and my finger on the yarn ball yarn. I hold this yarn, I hold this stitch to kind of stabilize everything. I flip my thumb and finger back. I come in under the thumb, go over the finger and go back through the hole where the thumb was and that's my second stitch.
Lean them back, come under the thumb over the finger, back into the thumb and tighten. So there's my three stitches. Now we're going to knit our first stitch.
Since we have a circular needle, we're just going to bring this over and treat it as if it is regular straight needles. I'm just going to knit that first row.
Step 2: How to Increase
Ok now we are going to start with the pattern.
The pattern is increase at the beginning of this row and then the next row you just knit straight across. We're going to increase into this first stitch.
Knit the first stitch and then instead of sliding it off the needle, I'm going to bring my right needle behind the left needle and now i'm going to knit that stitch and slide it off the needle.
Now that was an increase made and you can see the increase stitch makes kind of a purl bump right there that is created on an increase stitch and that makes it very easy to identify whether you've done an increase if you are looking back at the rows.
Then you just knit the rest of the stitches in the row. Now we are going to knit the next row.
Okay now we are back to an increase row so before I do that, I'm going to take my locking stitch marker and place it on this side of the work so that I know this is the side that I'm always going to increase on. I use a locking stitch marker because you can move it up as you work. It's just a little bit easier.
Now we're going to make that increase again. So I go into the stitch. Before I take it off I go around behind and go into that stitch from the other side. Now I knit that stitch and my increase is made. Knit the rest of the row. Now this next row is just knit.
So the entire thing is knit every row except for that increase that you make at the beginning of every other row. You can get a really nice rhythm down with it. It's going to go fast. I'm going to knit a few more rows and then check in with you. Here's my increase.
Step 3: Knit the Shawl
Ok now I want to check in and see how you are progressing.
How are things going? Does your knitting look like this?
It should be this triangle shape that you are getting here and right here you can see this is the increase side of the work.
I have my stitch marker over here to remind me that when I'm on this side I'm going to increase and over here this is where we start a straight row of knitting. Now what's going to happen is this increase edge becomes the top of your shawl. So this is what your shawl is going to look like it's just going to keep getting bigger and bigger and bigger as you knit and increase.
I did have a knot in my yarn so that's why you see this abrupt color change. As you can see with the Shawl in a Cake yarn, there's a really nice transition in the colors. It's really pretty to watch a lot of fun to watch the colors change as you knit.
So let's keep knitting!
Step 4: Bind Off and Finishing
I am on my final row and I just want to show you how much yarn I have. Not that much.
I just have a few yards left and I always like to make sure I have enough to get across this really long row. So that's what's left here on this very large shawl and I'm going to start binding off.
Note: I have 143 stitches on my needle. You may have a few more or less than that, just make sure you have enough yarn for the bind off row.
Bind Off
Knit the first stitch.
Knit the second stitch and take the first stitch up an over that second stitch.
Then you are going to repeat that.
I'm going to knit the next stitch and take this one up and over.
Knit the next stitch and take this up and over. You are just going to keep repeating this across the row.
Be careful that you are not too tight on your bind off.
If you are too tight then the overall length of that side of the shawl is going to be tight and it's going to look awkward.
What some people do if they if they have a problem casting off too tight, they switch to another needle for this. And they knit onto one that's maybe one or two sizes larger so that they don't have that problem. So you could try that if you feel like you're tight.
What I do is I tend to give a little extra slack and I don't pull up after every stitch. I just let it be loose.
Okay, now I'm down to my last stitch.
I'm going to knit that last stitch, lift the previous one up and over.
Now, what do I do with that last stitch? I'm just going to take a pair of scissors and cut it leaving a 4 to 6 inch tail.
Then all you do is you can actually take the needle away.
You're going to pull this yarn through the loop. And that's it!
Weave In Yarn Ends
Now you're going to weave in the yarn ends. So I just use a tapestry needle, finishing needle.
I'm going to weave in the garter pattern. So it's kind of a duplicate stitch is what you do when you're weaving in garter.
You can see my tail is here and I'm just going to come up on one of these stitches. Then I'm going to follow the row of purl bumps. So I came out here and i'm going to go in here and I'm just going to keep following that.
You do that for maybe 4 to 6 stitches depending on how much thread you have. The idea is to have it in there so ingrained that this thread isn't going to come loose and unravel. So what I do is I've done a few stitches.
Then I what I like to do is I kind of like to go back the opposite direction a few stitches and follow and that's it. Now I'm going to cut the thread really close to the end of the work being careful not to cut the work. You can't even see that.
That tail has been woven in. You are going to do that with your starting tail and if you had any breaks in the yarn you're going to weave those in exactly the same way.